Lee’s Paper Mache Recipe

Alright, folks, gather 'round! I’m finally spilling my secret paper maché recipe.

You will need:
- Shredded office paper (Or you can use cardboard, junk mail, egg cartons, they're all fair game!)
- Large container to hold shredded paper covered in water
- Stick blender
- Water
- Multi purpose compound
- Glue
- Reusable veggie bag / small holed mesh bag
- Large bowl (for mixing the recipe)
- Disposable gloves
- Zip lock bag

Step by Step:

  1. Soak your shredded office paper overnight for that extra juiciness

  2. Blend it into pulp using an electric blender

  3. Pour the pulp into the mesh bag and squeeze out the excess H2O

  4. Place pulp into large bowl and break apart into small popcorn sized pieces (Don’t let this pulp dry out before step 5)

  5. Now for the messy part: mix 4 cups of pulp with 1 cup of glue and 1 cup of multi-purpose compound in a large bowl (don't forget those gloves!)

  6. Let the creativity flow! Store leftovers in a zip lock bag for your next masterpiece.

    Remember, it's an art, not a science! If you're rockin' the cardboard, just throw in extra compound and glue. Get craftin' and hit me up for any crafting conundrums! Cheers, Lee

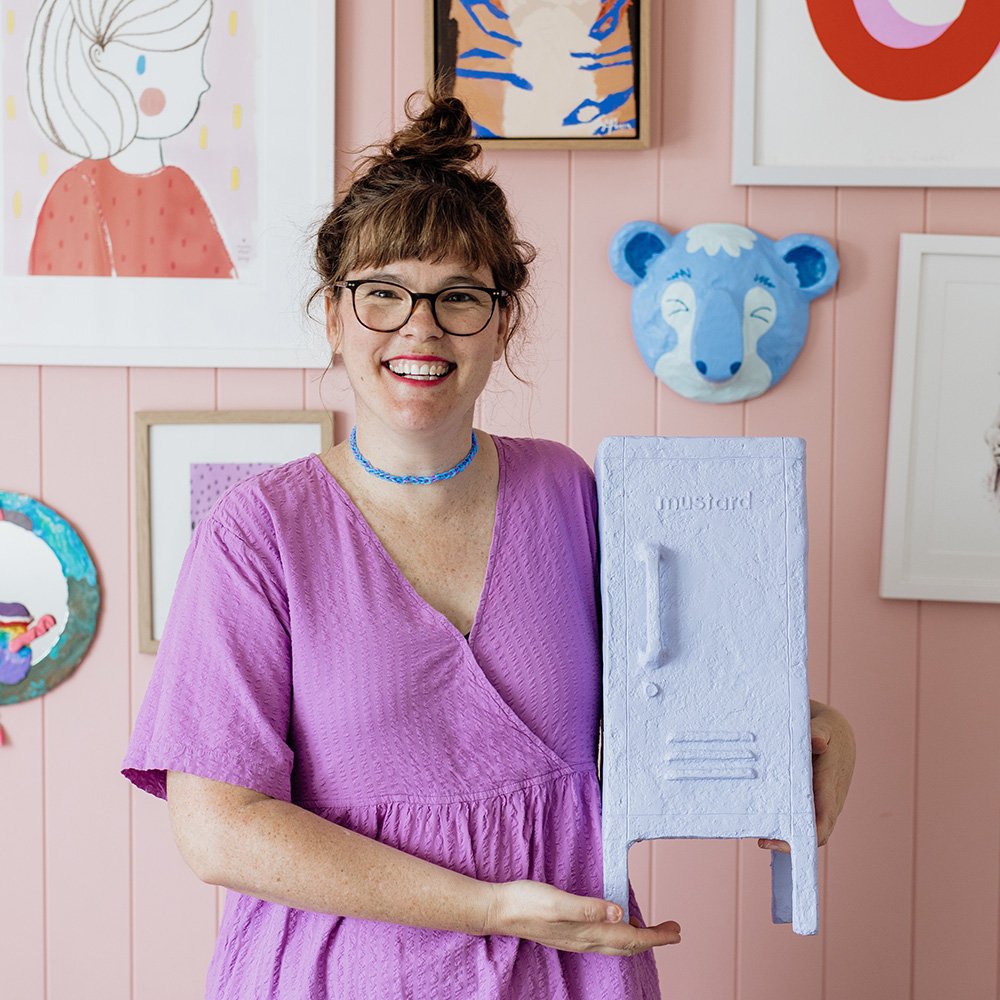
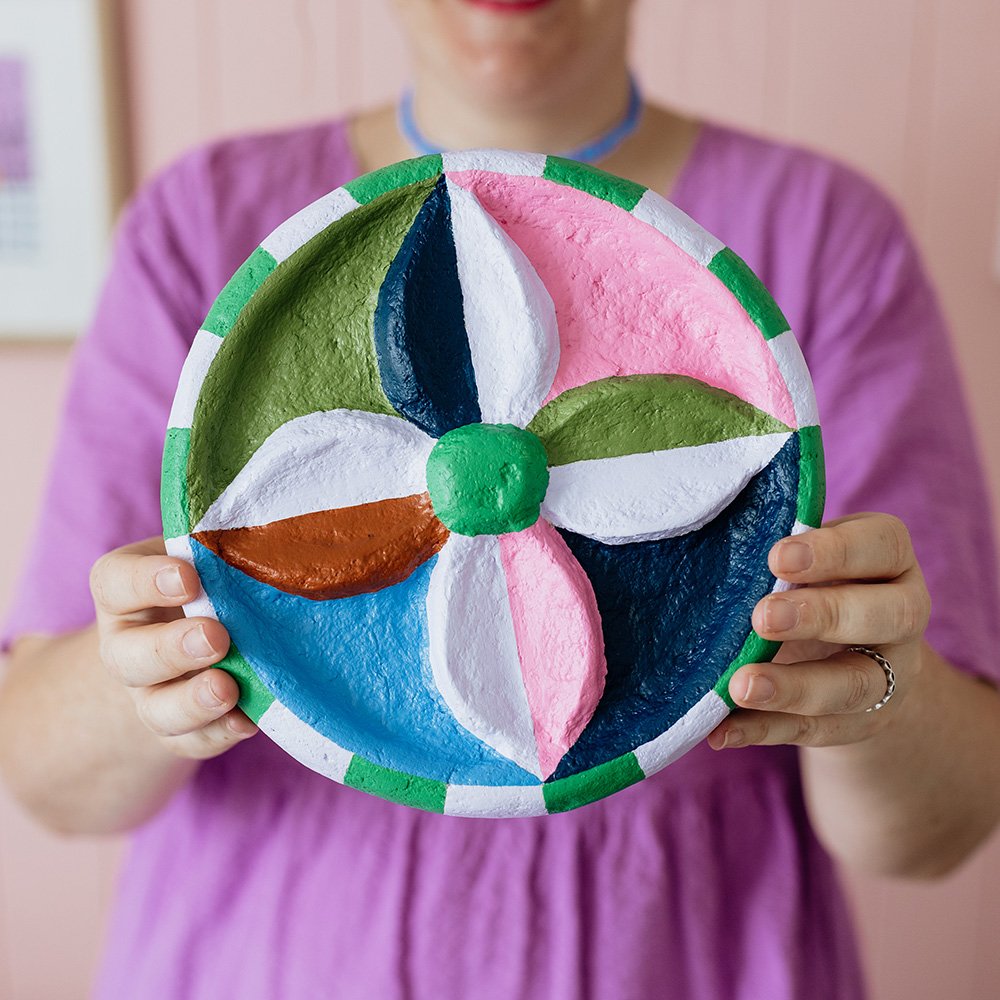
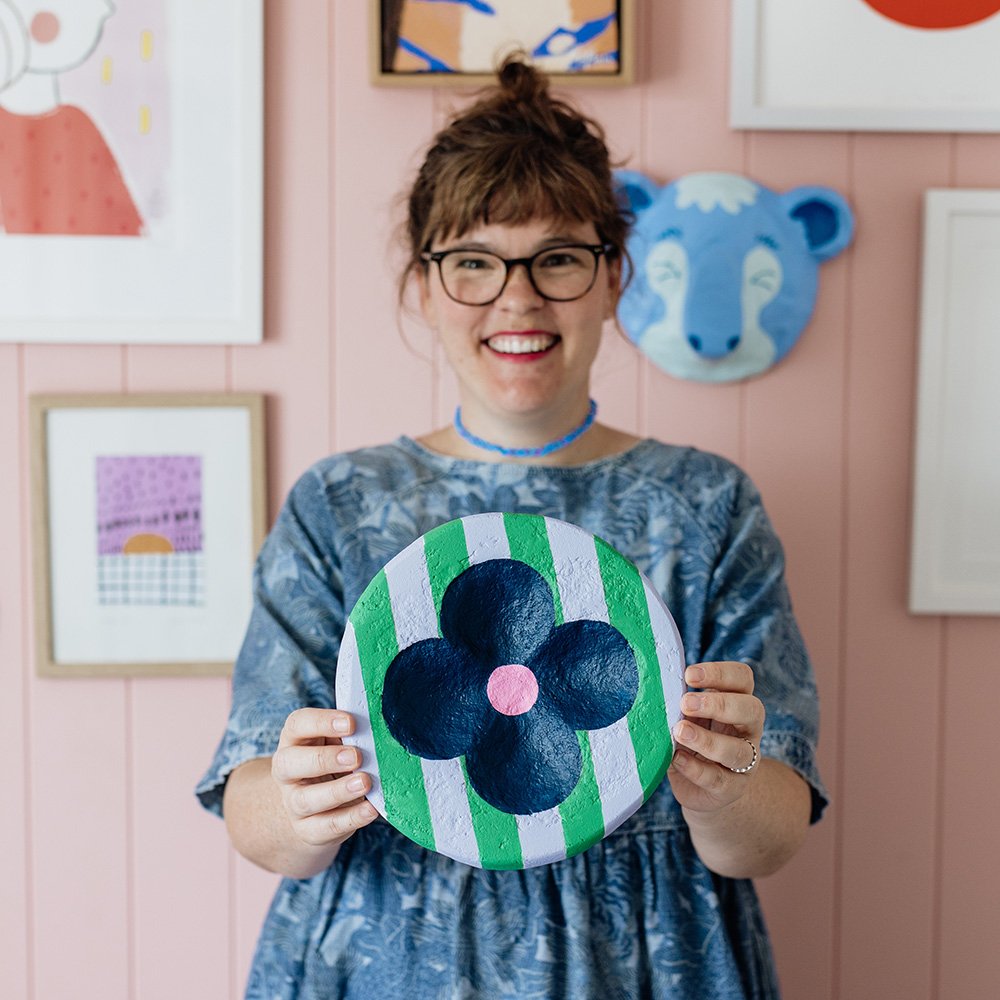
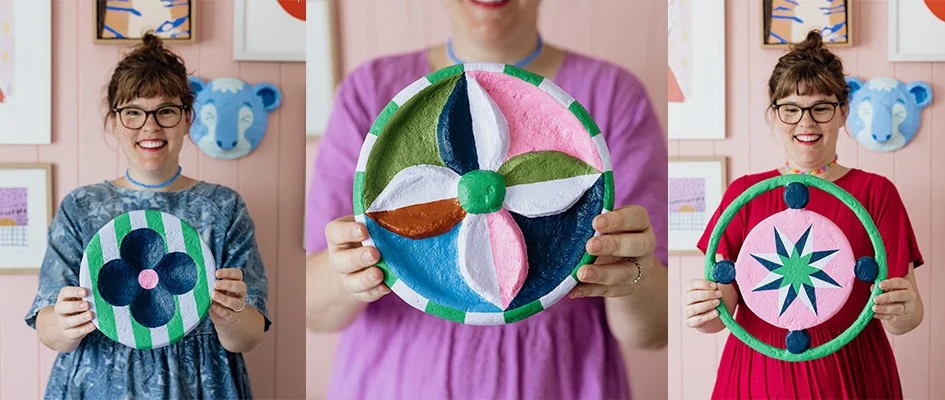
Below are just a few of my latest creations made using the above paper maché recipe

Creative Easter 🐰 food with our toys! Yes, you have read that correctly!

We love working with Make Me Iconic and below is the 18th shoot we have styled and shot for them.

To celebrate special occasions such as Easter, we always love thinking outside the box and creating fun new family traditions. These beautiful Easter cakes and hot cross bun creations are such a unique Easter surprise, or a fun holiday activity to prepare with your loved ones! Topped of course with some classic Make Me Iconic goodies from our online faves, you really can't go wrong this Easter!

Happy Decorating!

Makemeiconicwoodentoysaustralianmelbournesouvenirs1.jpg
Makemeiconicwoodentoysaustralianmelbournesouvenirs2_0585767b-92d0-4e6e-952a-a0f7b77e5691.jpg
Makemeiconicwoodentoysaustralianmelbournesouvenirs3_b180efab-86bc-4f90-b9a7-15a312264d0d.jpg

How easy is it to decorate a Easter cake using our wooden candy toys on top! All you need to do is raid the toy cupboard and find our iconic candy jar toy. Give the wooden pieces you want to use a quick wipe with soap & water (but make sure you don't completely emerge then in soapy water!). Just a quick wipe with a damp cloth that has been soaked in hot soapy water will do. You could add a little disinfection spray to the cloth because after all the wooden toys will sit on top of the cake. Decorate and arrange the pieces how you like. Remember to remove them before cutting and eating the cake. These wooden toy pieces are not for eating! Use edible flowers to decorate the side of the cake or any other edible sprinkles you might have in the cupboard.

Source: https://makemeiconic.com/blogs/make-me-ico...

MORE WINTER PLAY TIPS: DIY NAPKIN CRAFT!

A couple of months ago Make Me Iconic put out a message asking for anyone crafty to apply for a collab.

Fast forward three weeks and I am super excited to not only tell you I got the job but below is the what I made to go alongside their wooden tea set to extend play time.

Blog_Top.jpg
Gather these goodies! Sewing machine + thread (choose a fun colour), Iron, Ruler, Material scissors, Pencil, Material (in your favourite print)

Gather these goodies! Sewing machine + thread (choose a fun colour), Iron, Ruler, Material scissors, Pencil, Material (in your favourite print)

A little bit of maths. Measure and mark out 2 napkins (14.5 x 19cm each) plus 2 placemats  (25 x 19cm)

A little bit of maths. Measure and mark out 2 napkins (14.5 x 19cm each) plus 2 placemats
(25 x 19cm)

Whip out the iron. Fold back one edge of the material by 1cm and iron flat.

Whip out the iron. Fold back one edge of the material by 1cm and iron flat.

Repeat again! Move clockwise around the material folding back each edge by 1cm and ironing flat as you go.

Repeat again! Move clockwise around the material folding back each edge by 1cm and ironing flat as you go.

Sewing time. Sew the edges down

Sewing time. Sew the edges down

Blog_Step-07.jpg
Blog_08.jpg
Source: https://makemeiconic.com/blogs/make-me-ico...